How to install BOLT for Unity

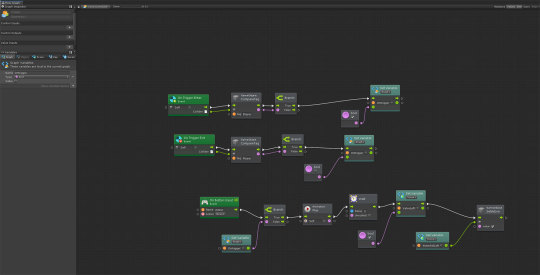
In this post I’ll explain a little bit about the plugin Bolt, why I choose it, how to install and where you can find useful resources to start learn it.

First of all, I decide to use bolt because for me is a way to get exited about prototyping an ideia and make my own games. And Bolt is a plugin that helps us to code without deal with c# syntax. There are other plugins that do the same thing, like PlayMaker, but, a few things made me choose bolt:

1 – Easy to use.
2 – Fast to learn
3 – The terminology is very similar to C#.
4 – You can do almost everything you can do with c#.

how much does bolt cost?
$70

Where you can find bolt? Unity Assets store in this link.
https://assetstore.unity.com/packages/tools/visual-scripting/bolt-87491

In this video i show how to install BOLT. During the install process I always choose “Programming naming”, it will make your transition to C# a lot easier in the future.

Now you know how to install bolt, soon i will bring some specific tutorials about bolt, for now you can check this resource list:

Bolt Oficial Youtube channel
https://www.youtube.com/channel/UCiuM3aD58vn2Hzk-5fytlBg

Bolt Oficial documentation
https://ludiq.io/bolt/manual

Bolt Learn center
https://ludiq.io/bolt/learn

One Wheel studio youtube
https://www.youtube.com/channel/UCkr9CPPqT9VWUjkpo3HcACg

One Wheel studio discord server
https://discordapp.com/invite/mBQRTHt

Creating a .gitattribute file in a Unity project.

First of all….what’s a .gitattibutes file?

According to git site:

A gitattributes file is a simple text file that gives attributes to pathnames.

The good thing os that you can use a generator to automatic create your .gittatribute file. in This Link you will find a tool to generate the code. just type Unity in the field and copy the content.

The next step is to create an text file in the root of you repo, paste the content, save the file as .gitattribute and commit to you repository.

1 – creating a text file. I love Sublime text to do this kind of thing. Paste the content.

2 – Save in the root folder as .gitattributes.

That’s it! just commit the file to your repo and you are good to go.

Creating a .gitignore file for an Unity project.

In this post we’ll see why and how to set up a .gitignore file. the idea is simple, we need to tell our repository what files we don’t want to send to the bitbucket server.

Heres a definition by the user

Mureinik  on Stack Overflow.

Tells git which files (or patterns) it should ignore. It’s usually used to avoid committing transient files from your working directory that aren’t useful to other collaborators, such as compilation products, temporary files IDEs create, etc.

Original post  Stack Overflow.

In order to do it we put an text file named .gitignore on the root of the repository. Using Bit Bucket we can do it in the project interface. see image bellow.

In the next screen is the place to add the instructions, but no worries,

GitHub maintains an official list of recommended .gitignore files for many popular operating systems, environments, and languages in the github/gitignore public repository.

In our case we’ll use the Unity Preset, just copy the content, put in the GIT ignore editor and click commit.

Write the commit message and click commit again.

Jobs done! In our next post I’ll show why and how to add a .gitattributes files in your project.

Setting up and host your project.

If you have never created/hosted a new GIT project, in this post I’ll show how to:

Create and host your project on Bit Bucket.
Clone your project in source tree.

Let’s get started!

You need to create your project on a git host service. In this tutorial I’ll use Bit Bucket, it’s simple, free and you can have a few private projects.

1.1 create your account.

https://bitbucket.org/product/

click in the link and follow the registration flow. As soon as you have a new account, I’ts time to create your first repo.

1.2 Click on the + icon in the top left corner. Give a name to your repo and make sure to select “Private“ and “Version Control GIT

image

2.1 – Now you can clone your project using Source tree.

2.2 – Download and install source tree.

2.3 – Clone your new project. Don’t forget to switch SSH to HTTPS, in the future we can discuss the diferences between both, but for now, use HTTPS.

And that’s it!

In our next post we will see how to make your initial commit. It will contain the

.gitignore  /.gitattributes and the first Unity files.


Some tech stuff.

First of all…the engine.

I choose to use Unity3D, for the following reasons.

– I have some experience using Unity (probably that’s the biggest reason).
– The amount of resources to learn and use. https://unity.com/learn-premium
– Bolt! (I will talk a little more about it below).
Shader Graph, used to develop shader without deal with code (or reduce a lot the necessity of coding). https://unity.com/pt/shader-graph

Shader Graph screenshot:

LWRP (Lightweight rendering pipeline). It provides the features and support that I want to my game. https://blogs.unity3d.com/pt/2018/02/21/the-lightweight-render-pipeline-optimizing-real-time-performance/

Bolt

– If you never heard about Bolt, it’s a plugin made by the company Ludiq to develop games using Flow graphs and State Graphs. according to Bolt website:

“With Bolt, your next game or VR experience could be brought to life without writing a single line of code. Welcome to the next generation of visual scripting in Unity.

You can check out on the Ludiq website: https://ludiq.io/bolt

GIT/SourceTree

During my career as a game artist I’ve learned something very important. USE A VERSION CONTROL!

If you don’t have a clue what git is, don’t worry, soon I’ll show how to setup and use it.

Git is one of the most popular version controls for code and I’ve been using it for years. to make it more user friendly usually connect it to a graphic interface. There’s a lot of different softwares to use git, I prefer Sourcetree made by atlassian.

Some useful resources:

What is GIT
https://git-scm.com/book/en/v2/Getting-Started-What-is-Git%3F

Sourcetree git client
https://www.sourcetreeapp.com/

For now, just check all the resources. In my next post I’ll show how to setup your project.